How to add SSH authentication key
In practical testing, you can add an SSH authentication key to the development repository to push changes directly from the local environment to the development repository. This article describes how to add an SSH authentication key and develop with an IDE or other tools at hand.
① Create an SSH key pair
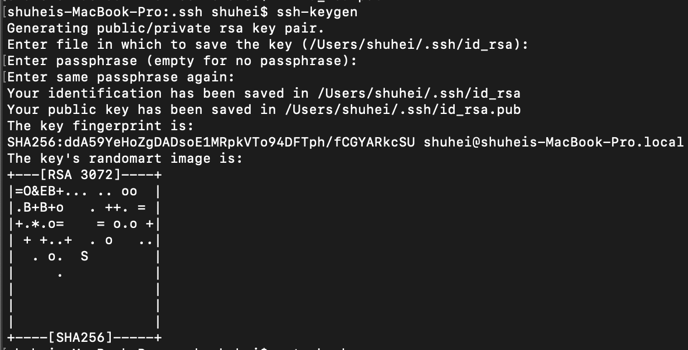
Execute the following command from your terminal to generate an SSH key pair.
ssh-keygen
If the key pair is successfully generated, you will see the following output.

② Register the public key
- Next, copy the generated public key. The following is an example of a key generated in RSA format under ~/.ssh. Replace the public key file path as appropriate.
cat ~/.ssh/id_rsa.pub | pbcopy
- Click "SSH Authentication" at the bottom of the Practical Test Answers screen editor to display the public key input form. Paste the public key you copied in step 2) into the form and click "Add".
- If the public key is successfully registered, the message "SSH authentication key succeeded. is displayed at the bottom of the screen.
③ Set the private key
- Next, add the private key setting to ~/.ssh/config. The following is an example of generating a key in RSA format under ~/.ssh. Replace the file path of the private key as appropriate.
Host git.hireroo.io
    User git
    IdentityFile ~/.ssh/id_rsa
- After completing the settings, click "Next".
④ Clone the development repository
- You can copy the command to clone the development repository from "Add SSH authentication key" -> "Clone development repository". Execute the copied command from your terminal.
- When cloning the repository, you will be prompted "Are you sure you want to continue connecting (yes/no/[fingerprint])? Please enter yes.

- After cloning the repository, start the IDE or other software at hand and develop using git commands. After pushing all changes to the development repository, press the submit button to finish the test.